
She has done a great (and amusing) tutorial so please do check out her tutorial - it's great. I started with a 30-gauge wire and H8/5.0 mm crochet hook. I've had this crochet hook forever, don't even remember where I got it but that is the description on the hook itself.
So, you start by stringing on your beads. The first bracelet I used 10 beads which ended up being too long for my wrist (the blue and pink one). The second bracelet I only used 8 beads and it was a better fit (turquoise and white). I also made a sequin bracelet with only 6 beads, thinking that a certain little niece might like that one (the hot pink and sequin one).
So string on your beads, then make a twisty loop.

Crochet 3 chains, and then start to incorporate the beads into the crocheting. Add 1 bead, then just chain. Add 1 bead, then just chain.

Keep going until you've added all of the beads, then make 3 more chains. Cut the wire from the spool and thread back through the last chain. Remove the hook and tie off.

Make 6 of these. You can use whatever bead arrangement you like. All the same. All different. Whatever combination you like. For this particular bracelet, I did a bead and a sequin in each loop.

Attach them by twisting the wire ends together at ONE end (not that anyone would have twisted BOTH ends together and then had to try hard not to swear while unraveling them).
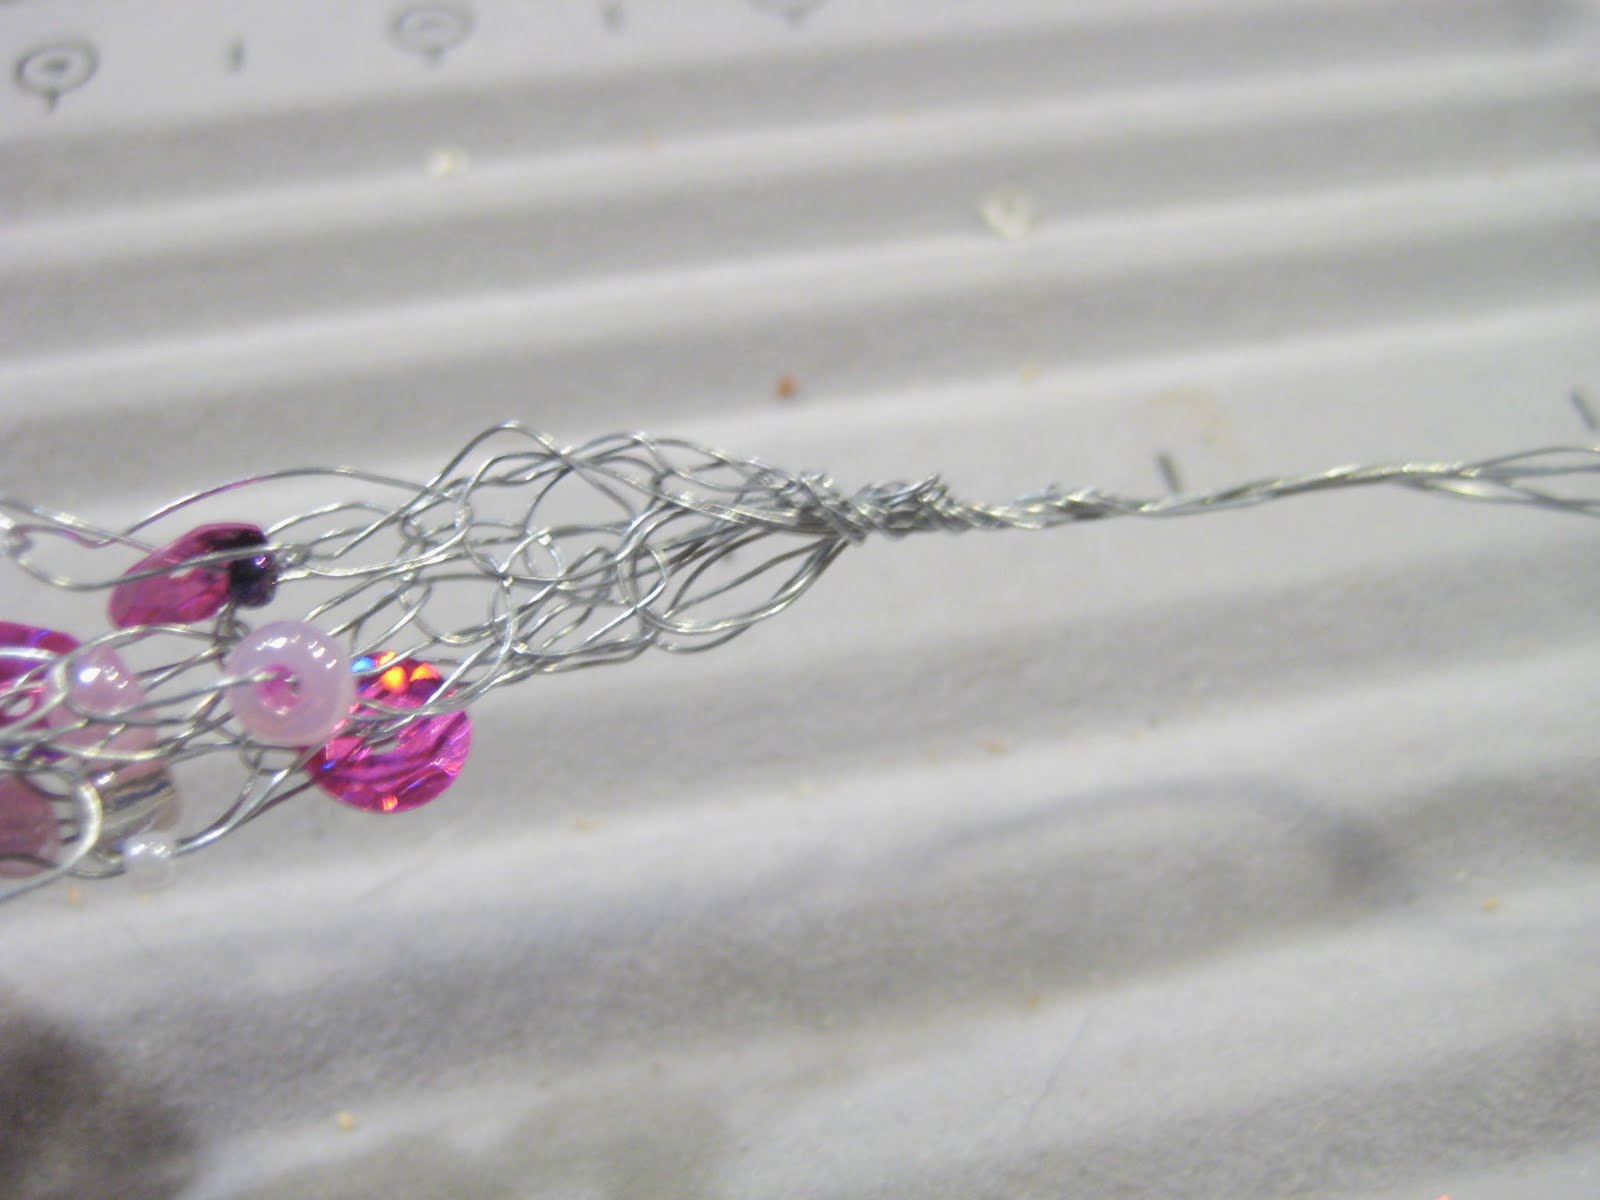
So twist one end, separate into three strands with two chains in each, and then braid them. When you get to the end, twist again (now is the time to twist the second end).

Add findings of some sort by threading the twisted end through the loop.

Fold the wire back onto itself to seal the finding. Repeat at the other end and you're done.

I love these. I think they look a little edgy and interesting and as I said, they are entirely addictive to make. (Sorry about the tea towel in the background.)

I had to wait until the next morning to get help from hubbie to put these on. Try as I might I was not able to fasten then by myself. Here's the shot:


Sundae Scoop Link Party - I Heart Naptime

9 comments:
I love these. So pretty! I'm not sure that I would have the patience to make them. :)
Oh my...this is complicated but they turned out so awesome. Love the pearl one!
these are amazing and beautiful! they look stunning! I found your blog through a link party and LOVE it! I am your newest follower and would love it if you would check out my blog and follow me too! Thanks!
-Nikki
http://chef-n-training.blogspot.com/
What a darling idea! Thanks for sharing.
Hi there- found you through the Strut Your Stuff hop and am a new follower. This is so cool! I was just looking at beads yesterday, wondering what I should do..I think this is next! I hope you have time to follow my life in South Africa by http://withoutcomplexities.blogspot.com
Have a great weekend!
WOW!! Looks great how creative you are! Love the one with purple
XO Lindsay
They are fabulous, you are so clever. I'd love try making one but think I'd end up swearing too much!
Terry, you are amazing! Just beautiful! Thanks for linking up! If I don't get a chance to tell you before, have a great holiday weekend!!
I really like this, but I think I will use a monofilament line for a simple stretch bracelet. That is what I thought you used, at first glance.
Post a Comment